Learning about Auto ISO
Can I trust Auto ISO and exposure compensation?
On a beautiful morning just after Christmas with a low tide I decided to go for a walk and try and figure out how to use my telephone photo lens, the M.Zuiko Digital 100-400 mm F 5.6 on my OM1 mark 2 body. This was my first opportunity to get out for a good couple of hours since I bought the new lens.
I was surprised to begin with that the Auto ISO was setting itself so high, often above an ISO of 1000 in what I considered to be very bright conditions. So I decided to try manual ISO. I had the Auto set to default to an ISO 200 but ranging up to 12,800 so I turned Auto off and came down to 200.
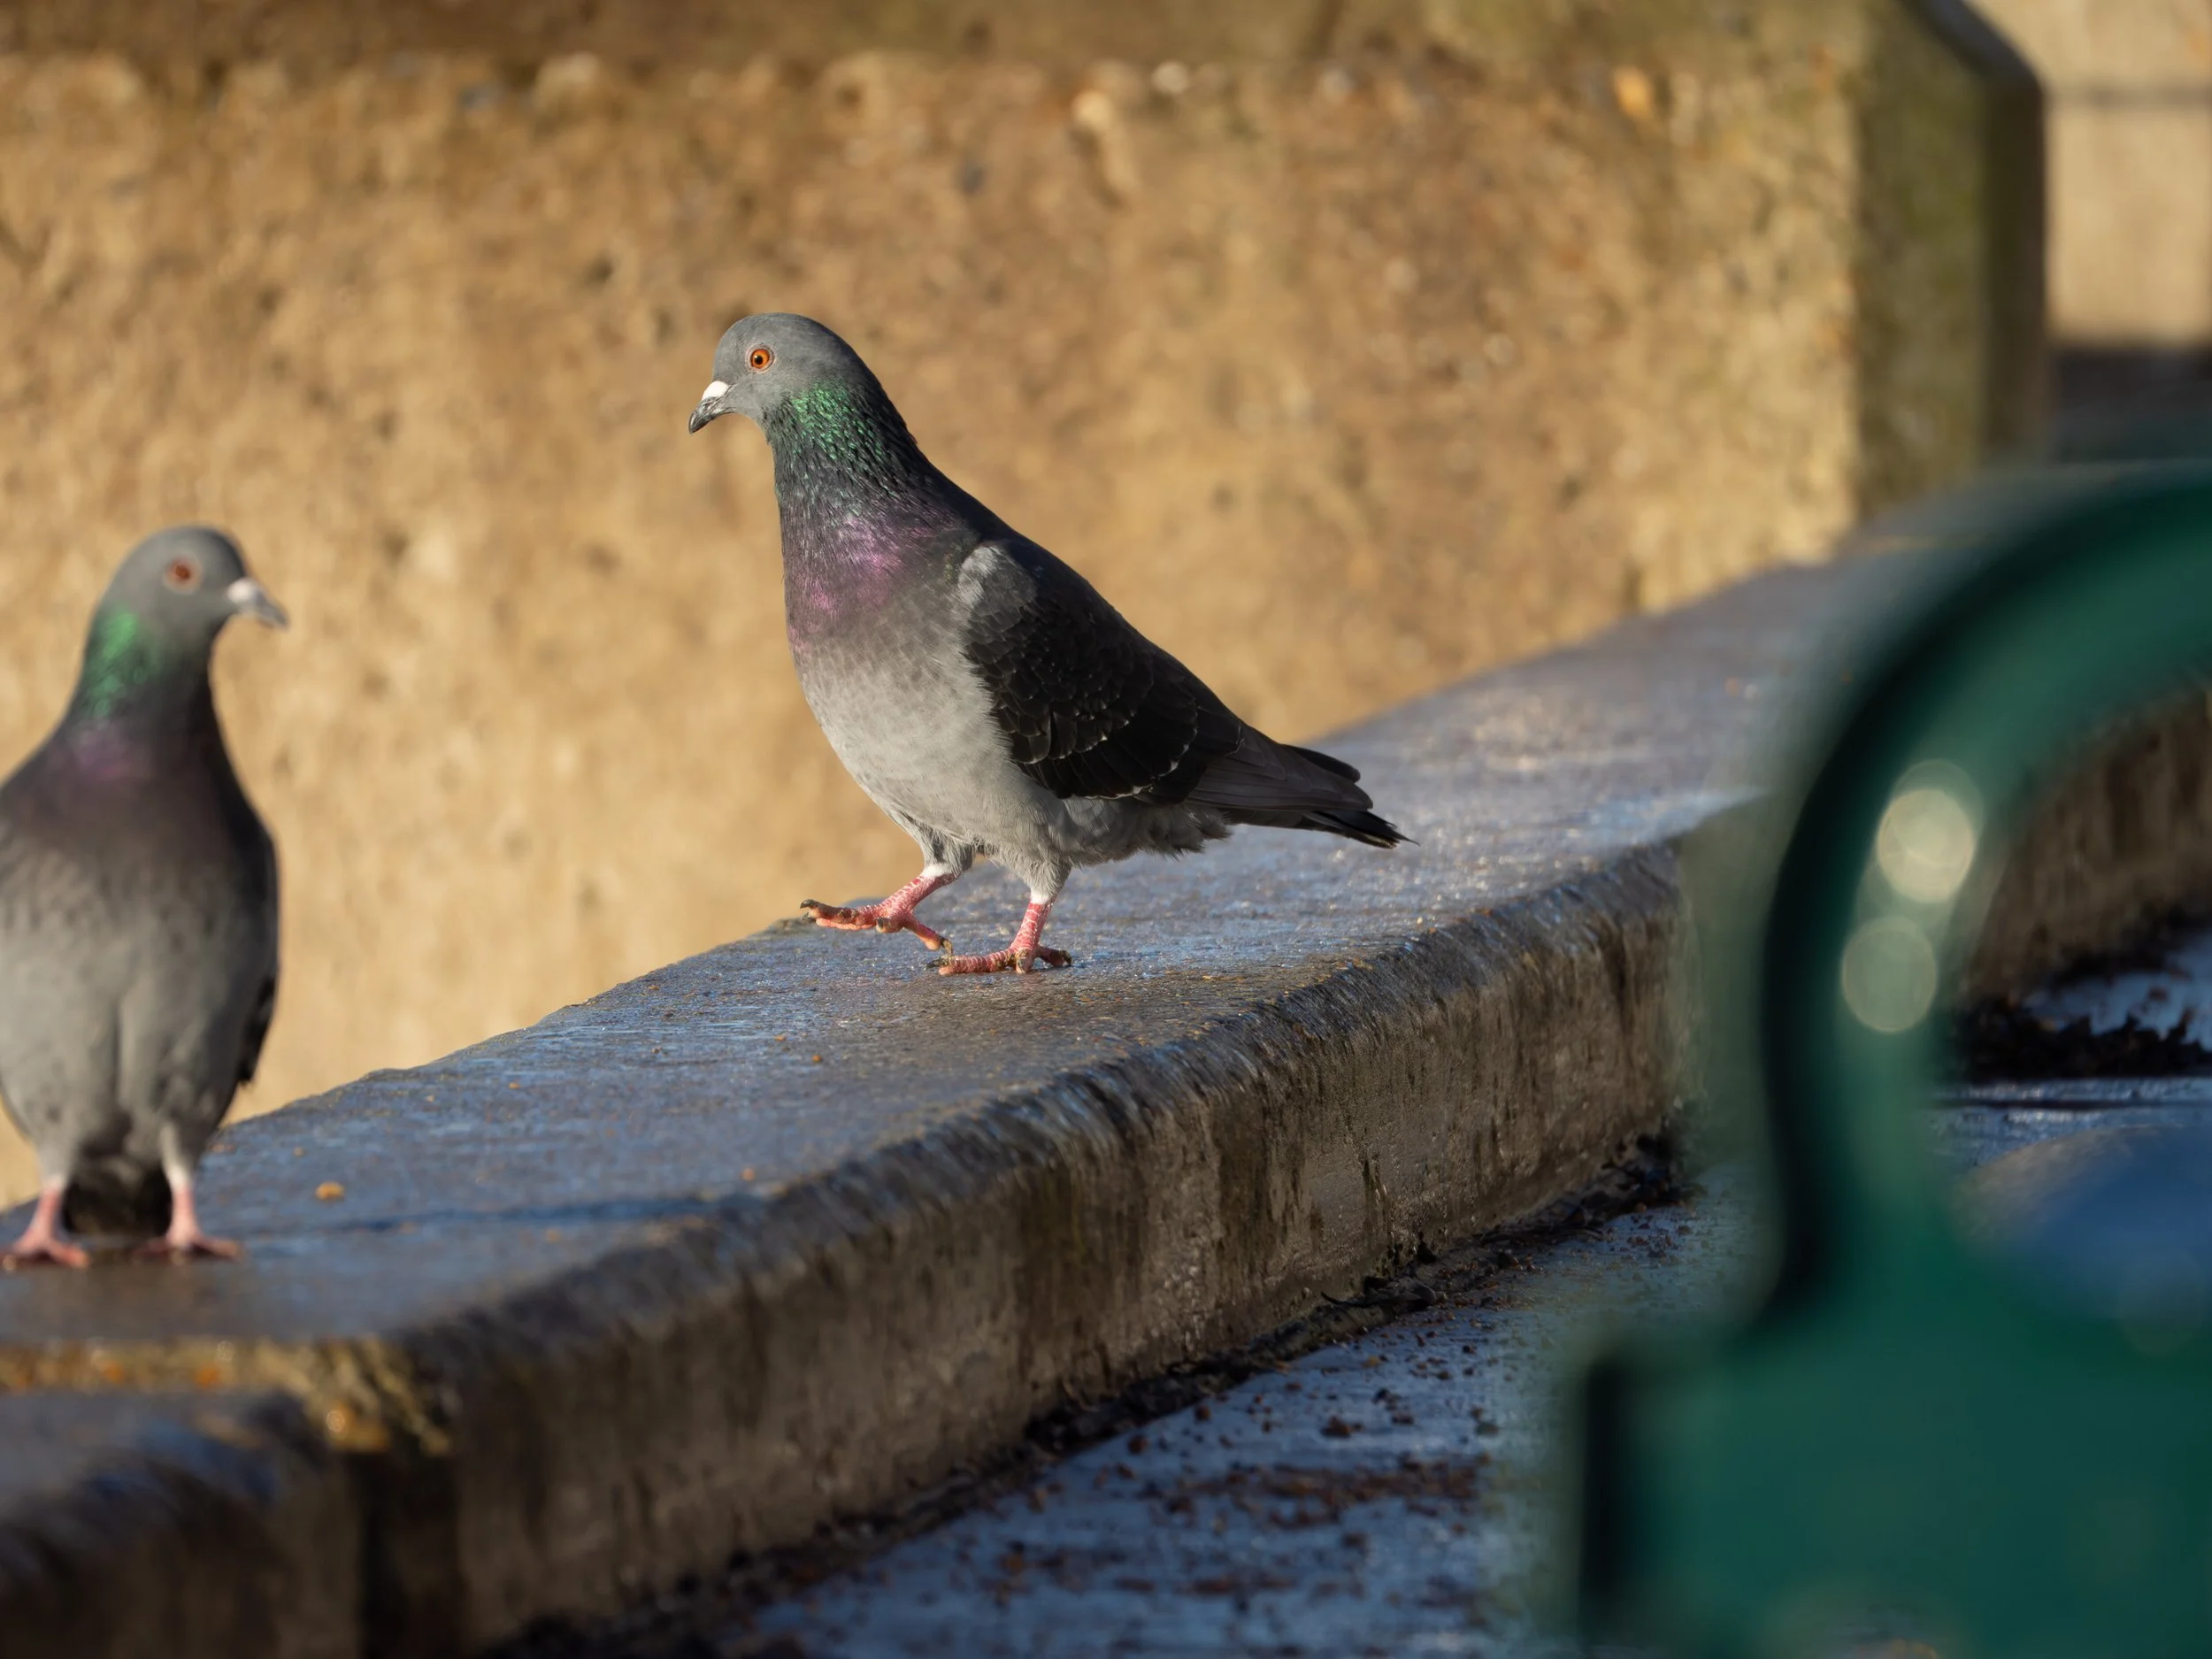
Two feral pigeons stand on a stone promenade wall in low winter sunlight, their feathers catching subtle colour against the muted urban background.
1/1250, F6.3, 400mm.
This first image of a pigeon was taken out of a distance of about 5 m with a manual ISO of 200. The picture is very sharp but was too dark. Looking through the EVF with a manual ISO showed me what appeared to be slightly dark but decent images. Correcting it in Lightroom was insignificant in terms of difficulty but lesson learned. They looked reasonable on the back of the camera. Auto ISO is fine but it needs sensible limits. As a result I’ve adjusted my custom mode that I use for birding so that the maximum is now reduced to an ISA of 6400. This gives a better balance of exposure safety and highlight control and still limits the amount of noise so that I’m happy to live with it.
Then I turned the auto iso back on and started fiddling with exposure compensation dropping down at times all the way to -2 to stop the highlights being clipped through the EVF. That led to even darker photos. What I’d forgotten to do, and my learning point for this particular exercise, was to check my histogram. The curve was moved significantly to the left by my efforts and when I viewed the images on my computer after the shoot, they were obviously too dark. Of course, as these were raw files, they were salvageable but they taught me a better lesson than any YouTube video or website could.
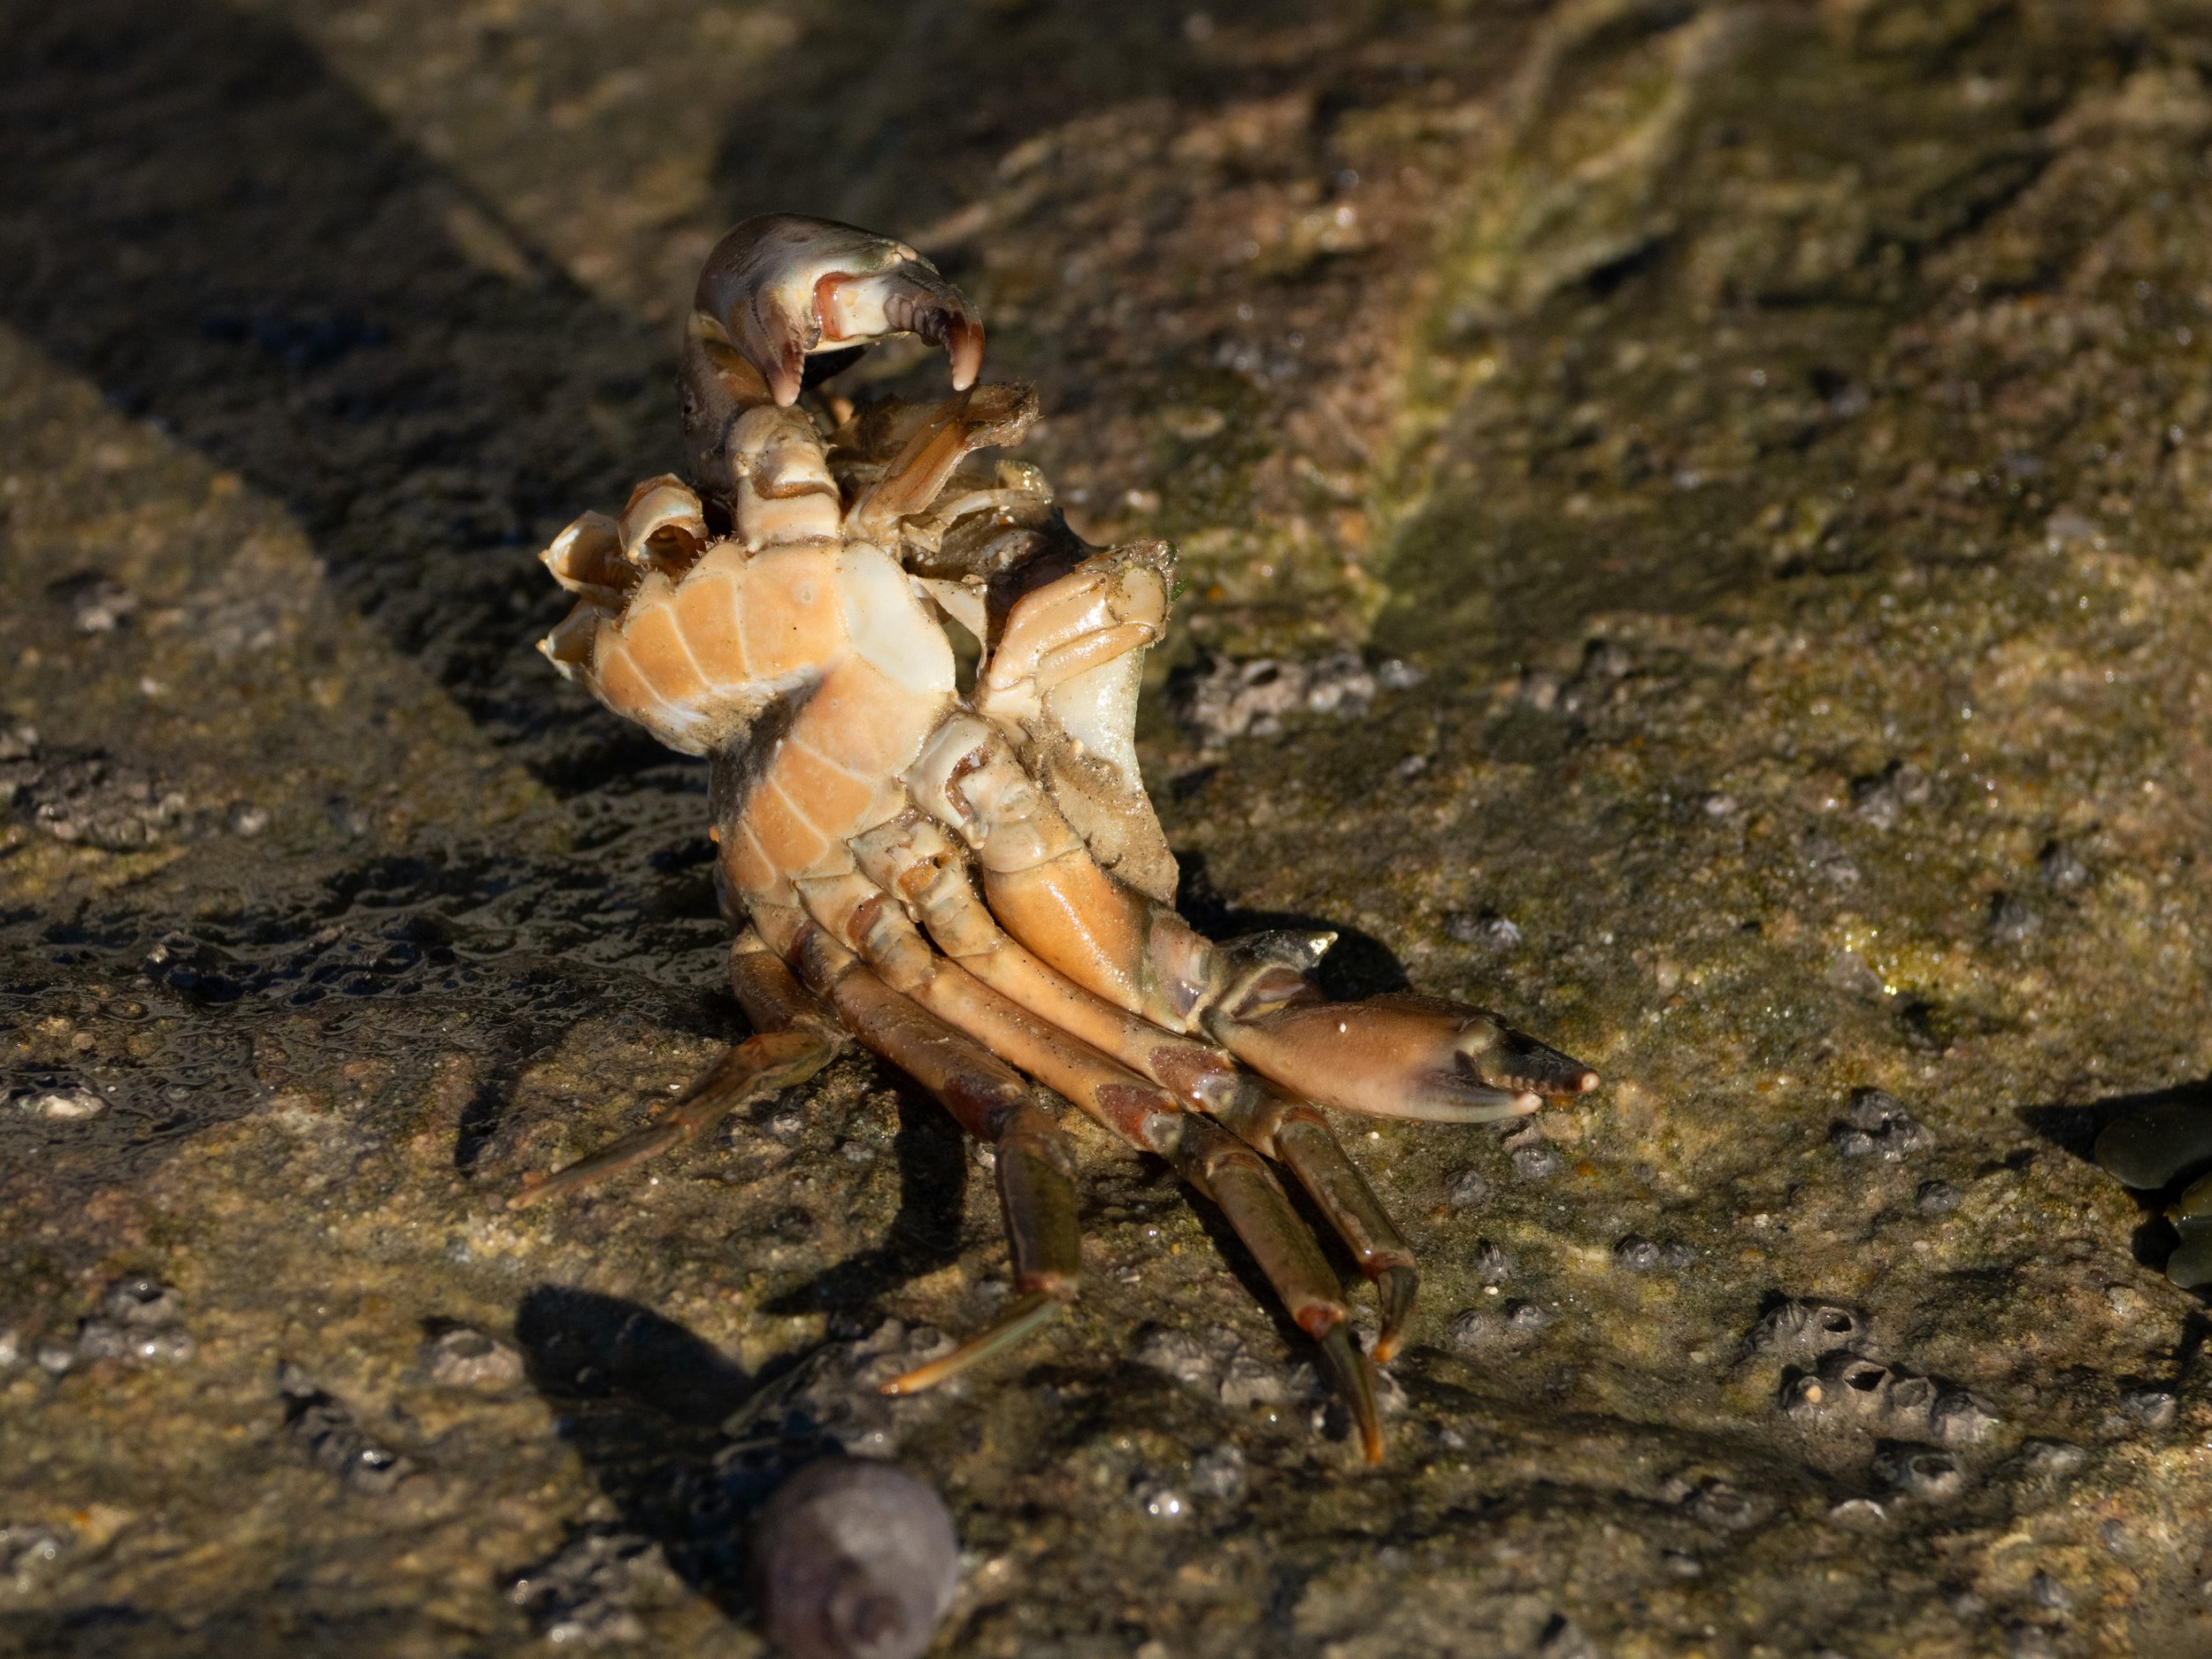
The discarded remains of a crustacean lie on a textured rock surface, picked out by strong winter sunlight and deep shadow.
1/2500, F6.3, 269mm
This image of a crab exoskeleton demonstrates using the exposure bias. At a focal length of 269 mm and an Auto ISO of 800 the white highlights at the front of the carapace were clipping. Reducing the exposure compensation to -0.7 essentially removed that. It made the rest of the image a little darker but again it was nice and sharp and required minimal manipulation in Lightroom classic.
Exposure compensation is really helpful and indeed I’m discovering with the OM 1.2 that often I need to reduce it by 0.3 to get images that look right to my eye. Anything up to one stop is okay and with yesterday‘s conditions of bright sunshine and chalk cliffs -0.7 worked well. What I do need to make sure of is that I don’t over-reduce brightness when highlights aren’t actually clipping.

A Great Black-backed gull rests quietly at the edge of the sea, framed by soft foreground blur and winter light along the shoreline
1/2500, F6.3, 400mm
Another image with slightly challenging light was this Great Black-backed gull. It’s white chest and head reflected the low sunlight and extraordinary amount. Even switching to centre-weighted average exposure the Auto ISO set itself to 1000. Again reducing the exposure compensation to -0.7 brought the risk of clipping down significantly. The dark rocks proved a little challenging from an exposure control point of view but I liked the framing.
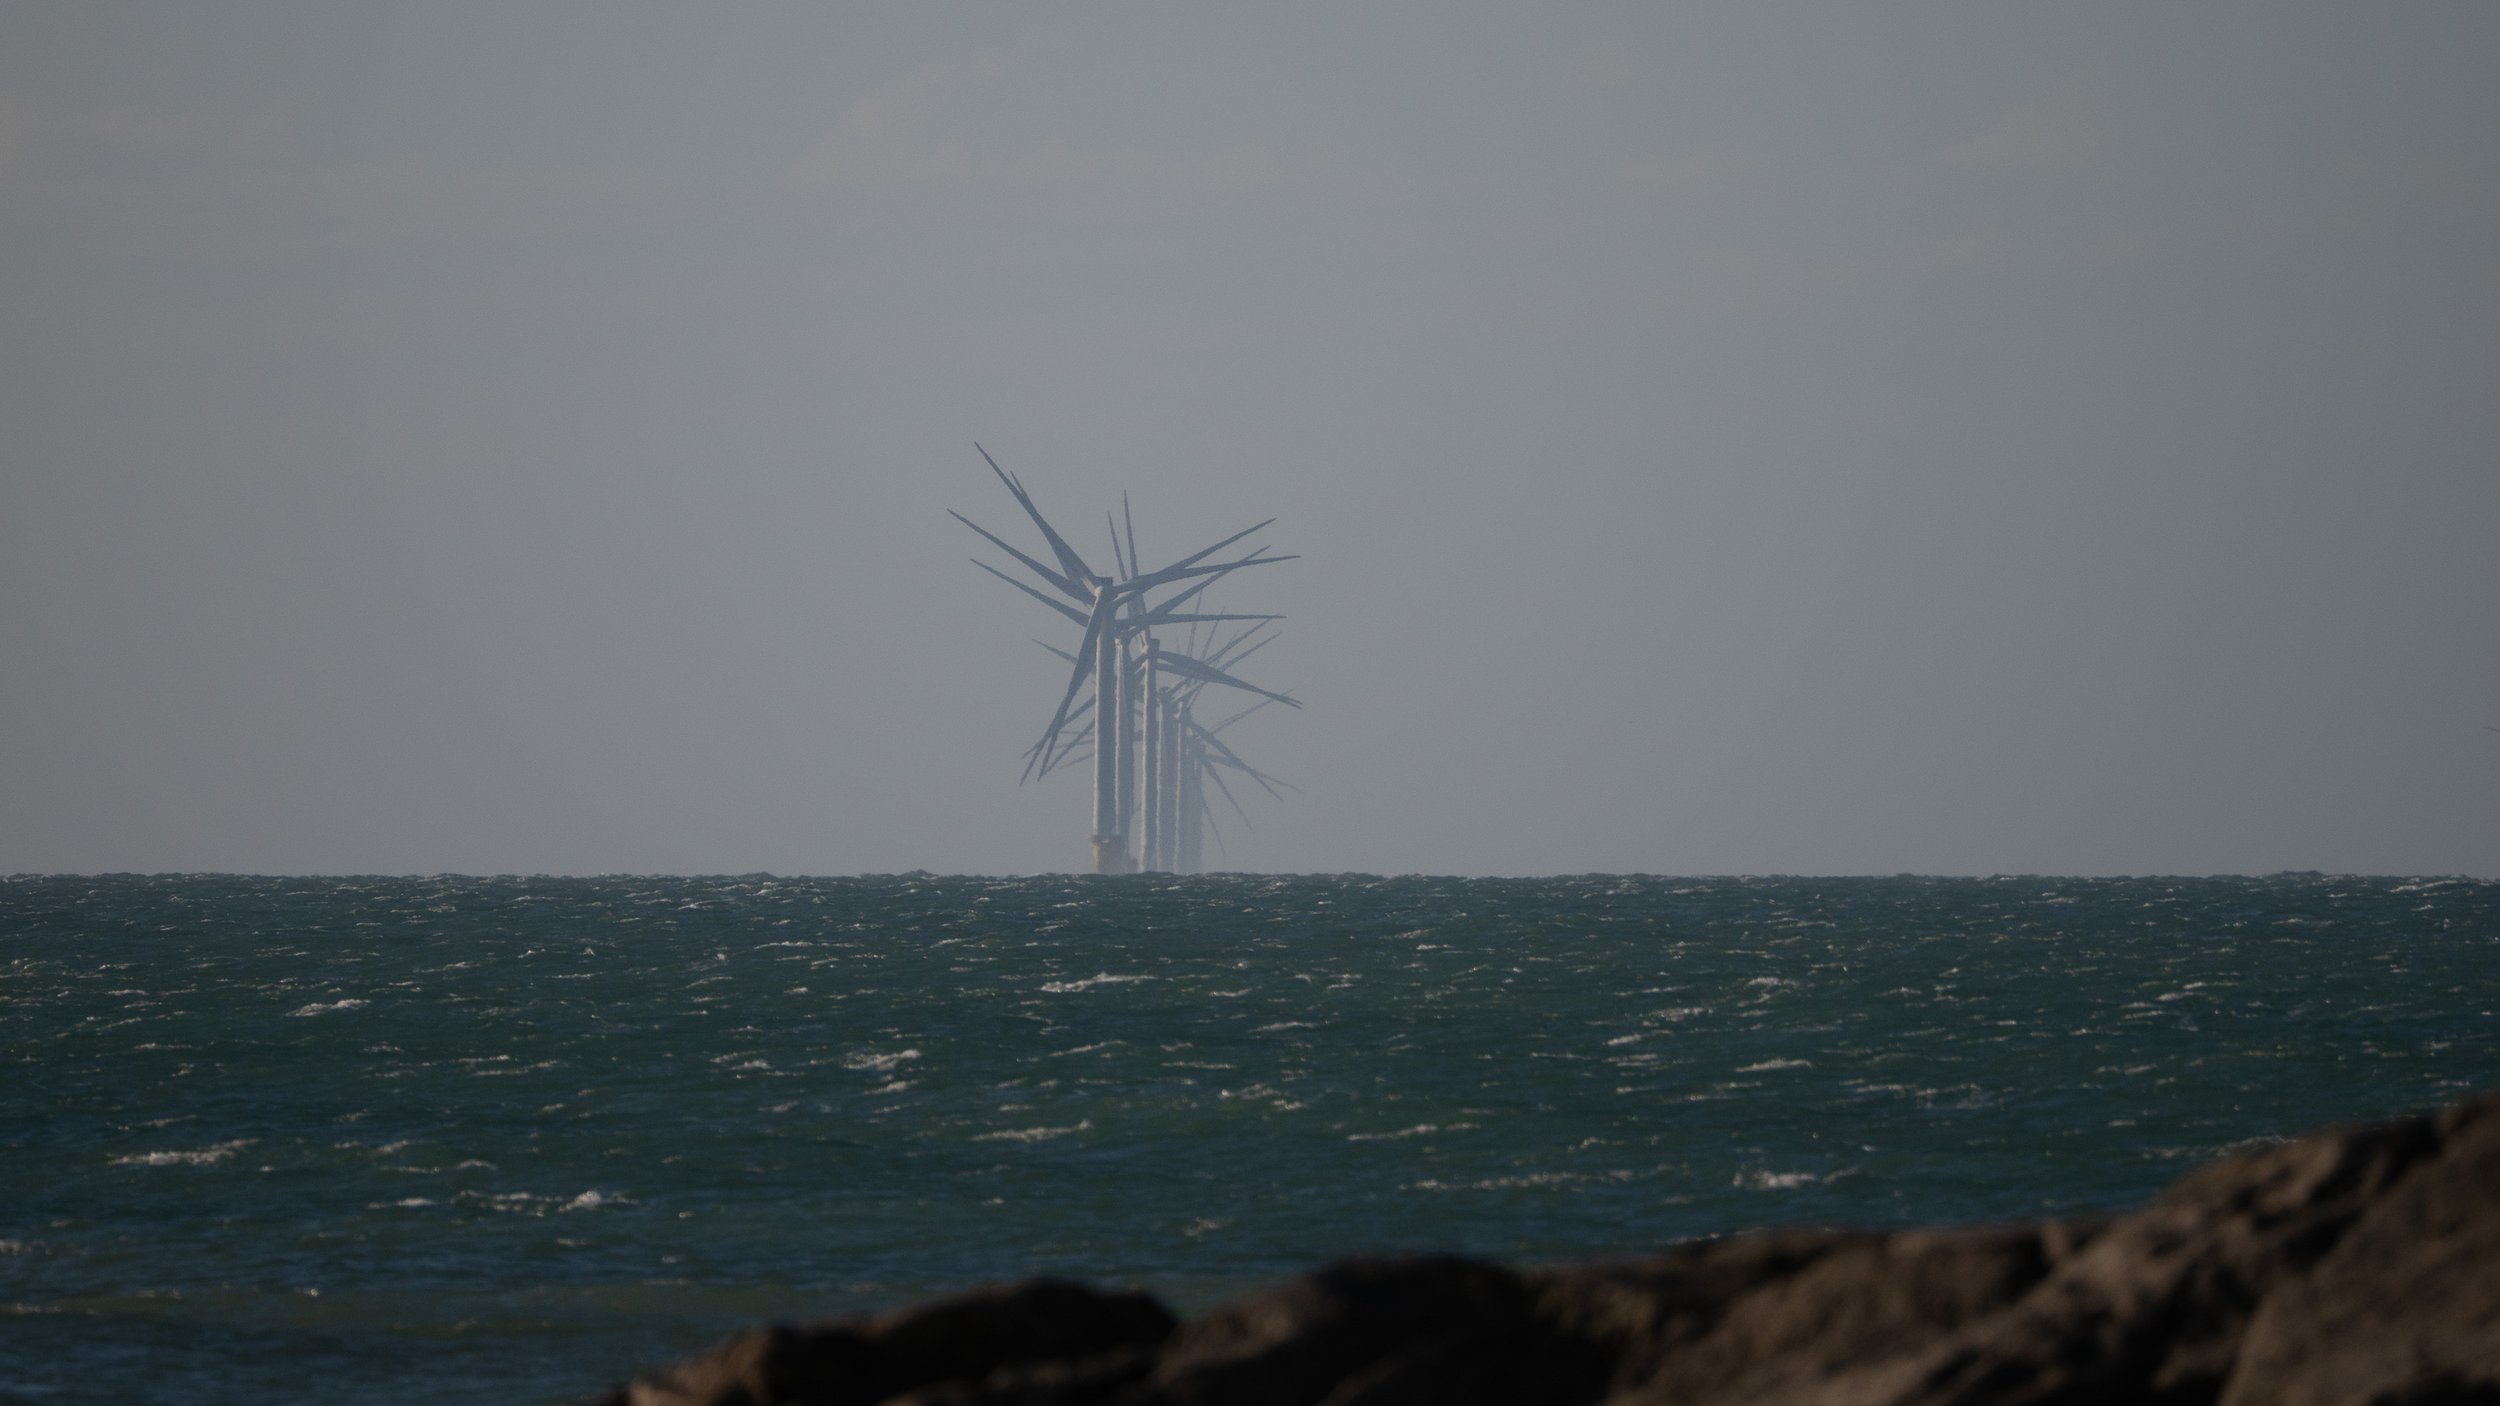
The distant turbines of Rampion Wind Farm rise faintly through sea haze off the Sussex coast, reduced to shape and tone against a winter horizon.
1/1600, F6.3, 400mm
I’ve been trying very hard to get sharp photos with my new equipment, with varying degrees of success. However, I discovered when editing this next shot of one line of turbines on the Rampion Windfarm that softness can be a feature and not a flaw. Editing the image in Lightroom demonstrated to me that images need to look real. It’s very easy with modern tools to sharpen, darken, put in ingredients. But sometimes doing that affects the realism of the shot. These turbines are at least 8 miles away from my camera. Hasze and lack of contrast are inevitable at those distances and attempts to change that, if taken too far, can ruin a photo, making it look like it’s been created rather than taken. So sometimes the right edit is preserving softness, not fighting it.
This was also the first time that I’ve used the OM1’s super high speed multi shot capability (SH2) in earnest. As a result, I came home with over 1300 photos from a two hour wander up and down the beach. The culling process was brutal and after three passes that number was reduced to 41. The images that survived did so without persuasion and a clear distinction emerged between images with presence and potential and images that were just interesting moments.
Overall I really enjoyed both getting out with my camera and the post processing exercise once I got home. I’m looking forward to being able to do more of this. And to answer my initial question: yes, I can trust both. I just need to learn how to use them properly.